CAT II Q DEVICE - INSTALLATION
LEARN ABOUT THE CAT II Q FORESKIN RESTORATION DEVICE INSTALLATION & SIZING.
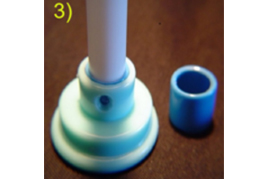
The most recent "silicone pushers" (Fig. 2) are a "push fit" onto the rod. Also, I've created a "blue bushing" (Fig. 3), which can be used with the plastic pushers, to make them "push fit", thus standardizing the attachment method of rod to pusher. A dab of lubricant may help to insert the rod into the plastic pusher bushing.
The CAT II Q foreskin restoration aid will be shipped with one tensioner rod in place. There is a hole in the forward end of each furnished rod for the furnished steel split ring, which can be used for tugging or securing. The diameter of the puller, which the skin must be able to roll over, is 35 mm or 1-3/8". You can use a cylinder of a similar size (mechanic's socket, pill bottle, modified toilet paper roll) to determine correct fit. Note: A 1 inch diameter CAT is also available, as a special order.


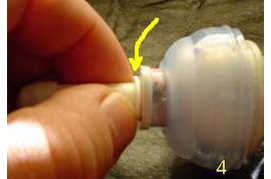
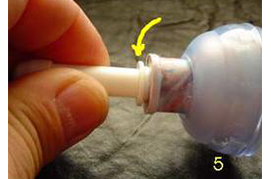
The highlight of the CAT II Q foreskin restoration aid is provided by the "Quick release/ Quick grab" device on the top end of the puller. As shown in figure #4, the small white collet is against the puller flange. When the collet is held in this position, against the puller neck, it will allow for sliding of the puller on the shaft, in either direction. When pressure is applied to the collet, toward the puller, it will cause both the collet and puller to recede back the tensioner rod, toward the pusher. When the collet is out of the puller a little (fig. 5 ), the puller will be locked onto the tensioner rod (this will happen automatically when tension is applied).
To apply the CAT II Q foreskin restoration aid, place the pusher portion on the glans, roll the shaft skin over the puller and secure by capturing with the silicone outer cone. Here, it might work best for you, to invert the outer cone beforehand and after the skin is in place on the puller, position the cone on the puller neck and snap it back into the correct position, over the skin. At this point, the cone can be lifted slightly to allow evening of the skin, under the outer cone. Proper installation will have about 3/8" - 1/2" of skin captured under the outer cone. The diagram below, depicts more skin under the outer cone, than is required.
After applying the CAT II Q, grasp the puller by the neck (Fig. 6) and slide the puller up the tensioner rod to the desired position, while holding a little pressure on the end of the rod. To remove the CAT II Q, I recommend lifting the outer cone to release the skin. To compress the CAT II Q, hold the tensioner rod end and with thumb and forefinger push the collet (Fig. 4) in to meet the puller flange. In some cases, to reduce tension or remove the CAT II Q, a little pull on the puller neck will be needed for the collet to release easily. This will release the grabber function and allow the puller to slide back toward the pusher (collapsed).
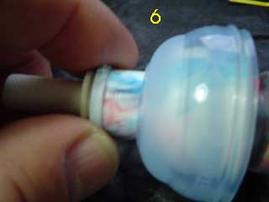
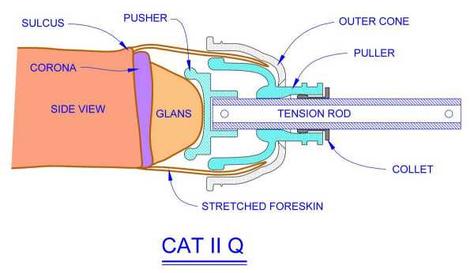
Don't forget, when the collet is against the puller flange, the rod will move. When the collet is away from the puller flange, the puller will be locked to the rod. Don't force it! Understand it first! Watch videos below.
CAT II Q Installation Instructions
Installing the CAT II foreskin restoration aid is basically like any other tapeless tugger. The FS has to be caught between the plastic puller portion and the outer silicone cone. Once this is done, then the tensioner can be gently tightened to promote growth of the FS. The skin can't be "stretched" for the final result .. it must "grow" through gentle tension.
The CAT II consists of a "pusher" to go against and push the glans, a "puller" for attaching to and pulling the foreskin, and a "tensioner" for adjusting the distance between the pusher and puller, thus adjusting the tension.
At this point, before installing, examine the operation of the CAT II foreskin restoration aid to see how it's going to function when installed.
The first step is to start with the tensioner rod all the way out, so that the pusher and puller are together. Then the pusher is placed against the glans. (Illustration #1) The skin is pulled as far over the device as possible, while pushing in on the device (Illustration #2). In order to install the silicone cone easily, it's best to get the skin completely over the puller. In other words, the skin should be caught on the tapered part of the puller. If your skin is too short, tape may be needed, for a time, to effectively lengthen the surface to be caught.
With one hand holding the skin in place, slide the cone over the skin and release. At this point the skin should be caught between the puller and the outer cone, which will hold the skin in place on the CAT II Q.
(Illustration #3) If your skin is short and it's difficult to get the cone over it, try inverting the cone and then snapping it back to right side out, over the skin. If slight adjustments need to be made (a bit less skin caught on this side or that), now is the time to do it. Just work the skin out a bit at a time until it looks even. If you lose the grip, simply start over. It will become easy with practice.
Once the cone is in place, tighten the tensioner to a comfortable point. (Illustration #4) I would suggest, if wearing briefs, to leave the end protrude between you leg and the elastic leg band.
To make it a "tugger", simply install the ring to the tensioner end and hook to something with a rubber band or something stretchy. Also, it could be worn as a tugger with an attachment to the leg or wherever.
An optional base ring might be used at the base of the penis to prevent scrotal stretch. (Illustration #5)
If there is a problem with the outer silicone cone slipping, it's most likely because, you are trying to use too much tension, the skin is a bit oily or there wasn't enough under the cone to start with. Wipe the oil off of the skin and cone with some alcohol.
DO NOT try wearing the CAT during sleep, as nocturnal erections will have no room for expansion.
Good luck!
